
Cabin Table
Categories
Tags
Recent articles
Ubuntu 16.10 LXC host on ZFS Root, with EFI and Time Machine
How to connect any serial device to the internet
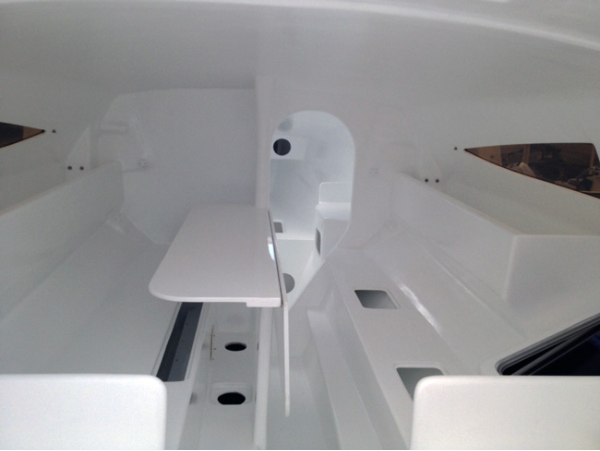
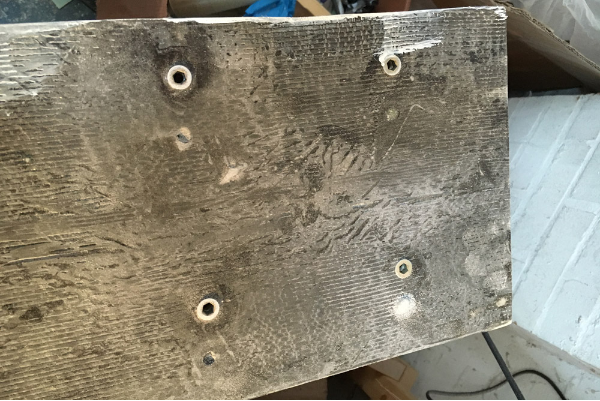
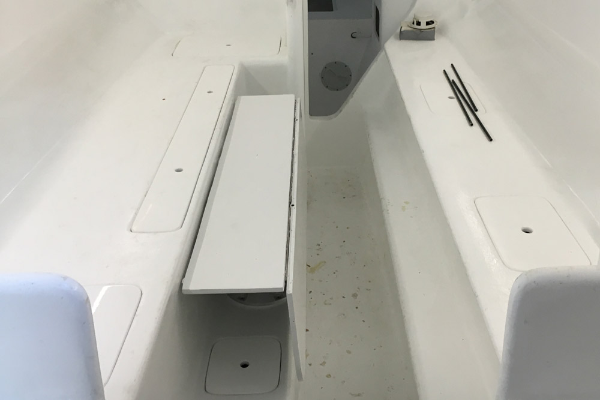
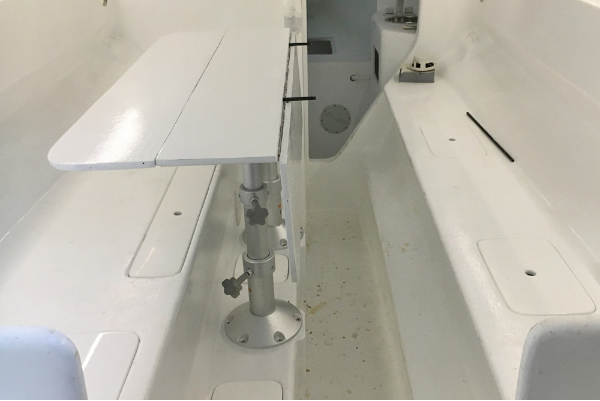
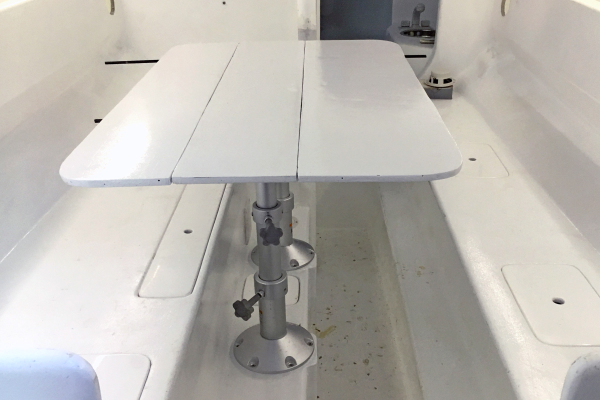
My F-33 is the narrow version; at 2.5m wide on the trailer, I can drive it without a permit. But it also makes for a narrow cabin. The table fitted by Multihulls Direct was way, way too wide for the boat, and was also glassed in as a permanent fitting. I wanted a smaller table that I could access from both sides, and that could be lowered to serve as a bed. I'd seen this sort of design in the wider F-33 interiors, but it needed a bit of thought to work around my existing interior.
(The photos in the slideshow above can be double-clicked to zoom. If you can't see the buttons and caption, the slideshow is still loading - give it a minute)
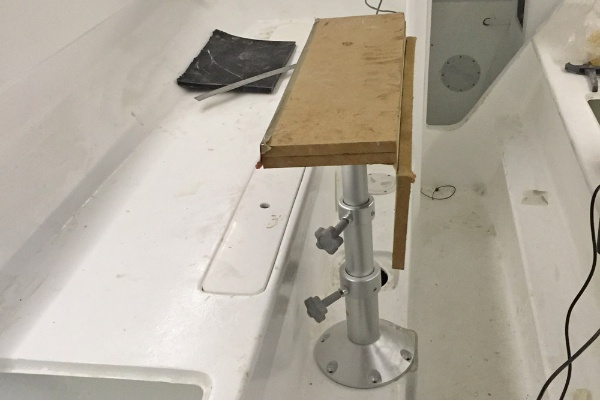
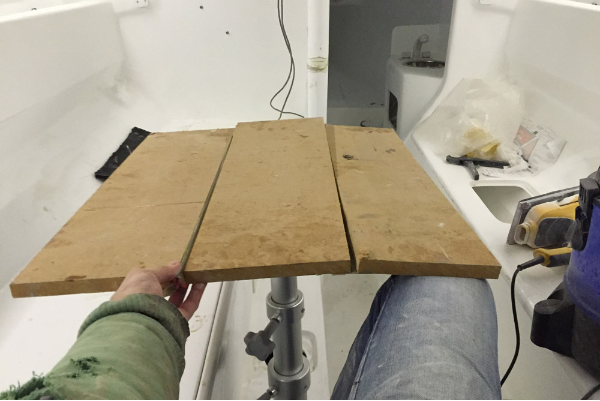
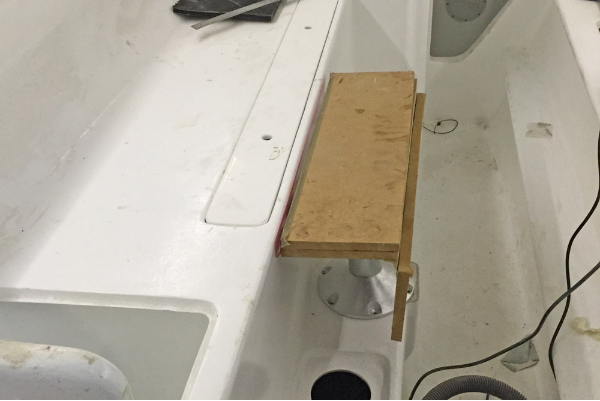
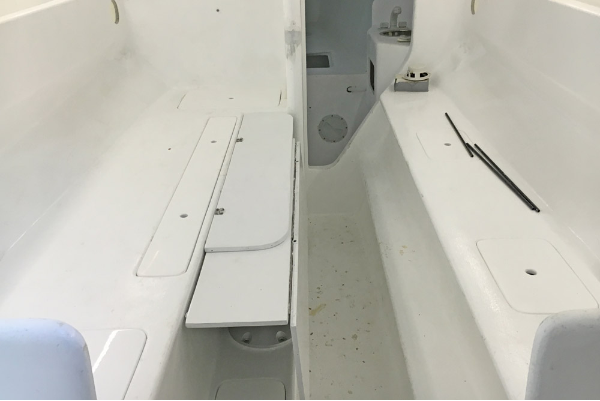
Eventually I came up with a three-leaf table, with one leaf hinging to fold up, and the other completely removable (I considered a 180° hinge, but it was too expensive). A bit eccentric but it should work, so I took a deep breath, picked up the angle grinder and cut out the original table before testing the new design with wood.
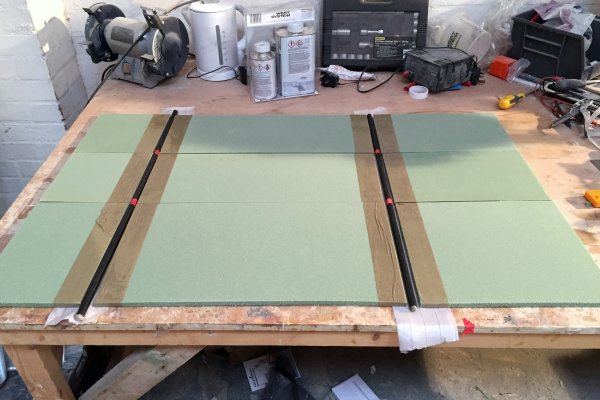
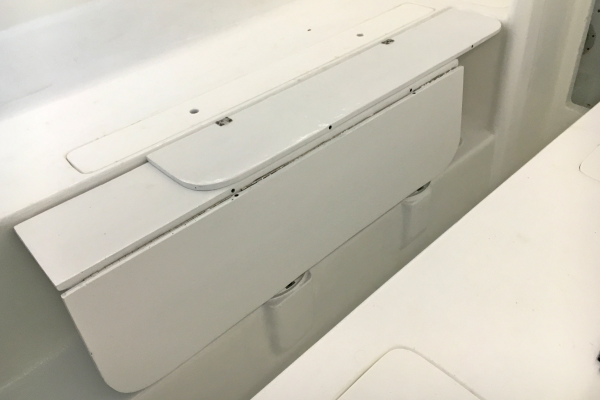
I'd struggled to find an unobtrusive way to keep the leaf supported when the table was up - google drop leaf support boat to get an idea of what's available. The options involved moderately significant hardware under the table, so I had the idea of embedding 12mm OD carbon fibre tubes into the table structure. These would line up in each leaf, and I could insert a smaller diameter CF rod into these tubes to create a rigid structure. A bit more effort up front but it meant no hardware to support the table; and if it didn't work nothing was lost, as I could always add more traditional hardware later.
Once assembled I found another issue: longitudinal flex. I'd used 10mm foam for the table top, and as I was trying to place one of the new table legs on top of the site of the old one, I was left with quite a long unsupported section. The rigidity comes from the distance between the layers of glass on both sides, so I tripled the thickness of the center leaf by epoxying on another two layer of foam to bring it up to 30mm thickness. Now there was no flex at all in the center leaf and I had enough thickness to epoxy some threaded inserts into the foam, the sort used for furniture assembly.
The side leaves weren't reinforced the same way, but the hinge on one side would ensure the folding leaf wouldn't flex. The removable leaf was anchored to the center leaf with the two CF rods, and I added a couple of 5mm "bumps" on one leaf that fit into corresponding notches on the other, to ensure the two leaves would keep aligned and not flex.
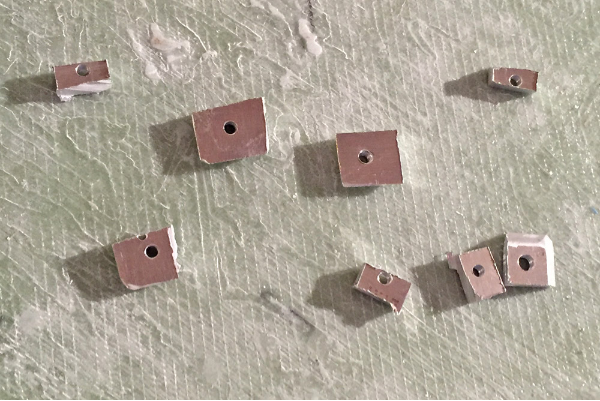
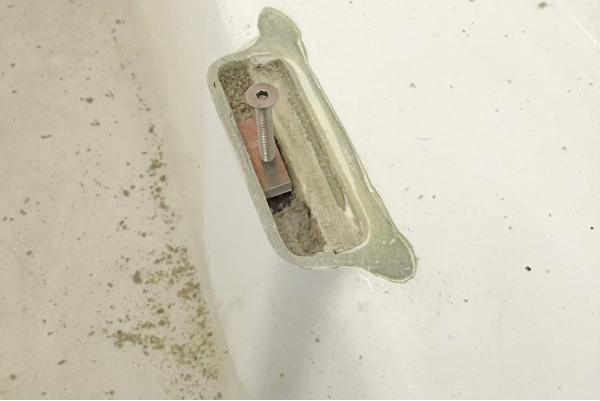
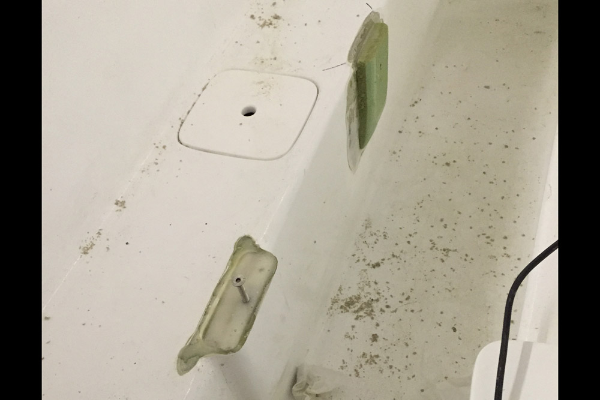
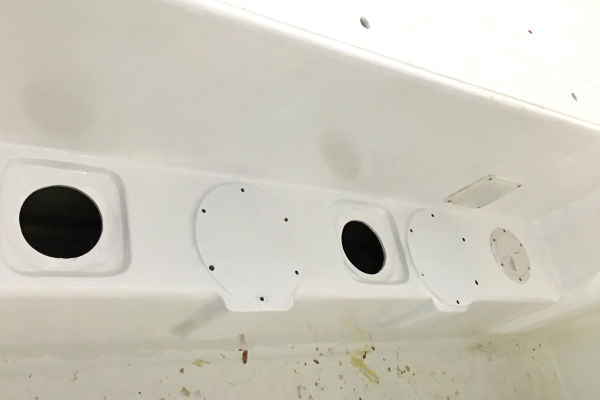
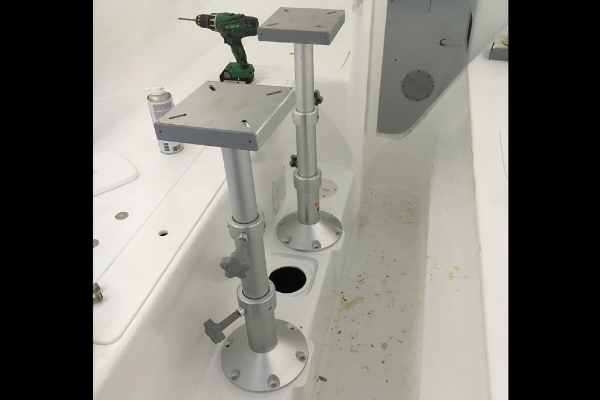
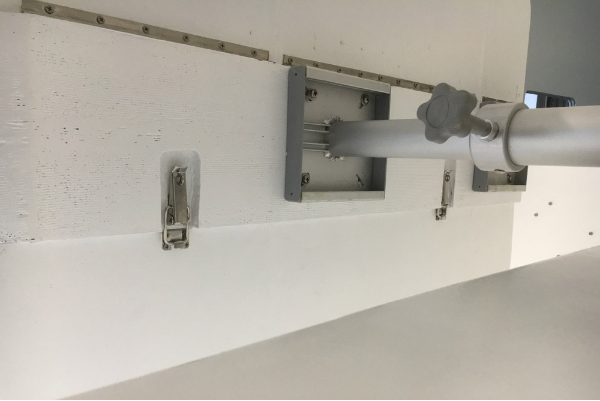
Finally it came to fitting. Surprise, surprise, the panel I was trying to mount the legs on wasn't flat in either direction, and aligning them exactly was proving impossible. I attempted to build it up with epoxy but results were poor. Then I had the bright idea of cutting two sheets of 4mm FR4 to the outline of the leg base; fitting the legs to the table top; taping the FR4 discs under the table legs, covering the bottom of the discs in thickened epoxy and loosely bolting the legs in place. Once set I removed the legs and the discs remained glued in place, perfectly flat and aligned with the table top. I filled around the edges and painted, and they look as if they were designed for the job. The FR4 isn't under much stress, it's just there to provide a level platform: the legs are through-bolted to the void below, or to a tapped plate where necessary as you can see in the photos.
I"m pretty pleased with the end results - the three 250mm wide leaves give a 750mm wide table, which is a perfect size. It can be dropped right down if necessary, and the leaves can be moved around to create (with the seat) a rigid 2000x800mm platform, a perfectly sized single bed. It did take a bit more effort than I anticipated, mostly trying to repair and stiffen the center leaf. Had I used 30mm foam from the start it would have been a lot easier. I was also constrained by the leg positions, but without that problem and with four CF tubes instead of two, this would be a design I'd recommend.
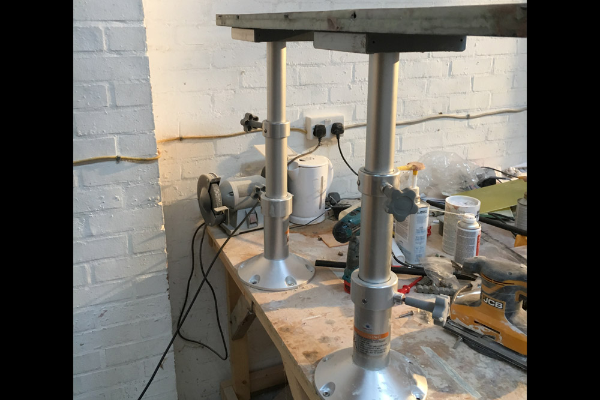
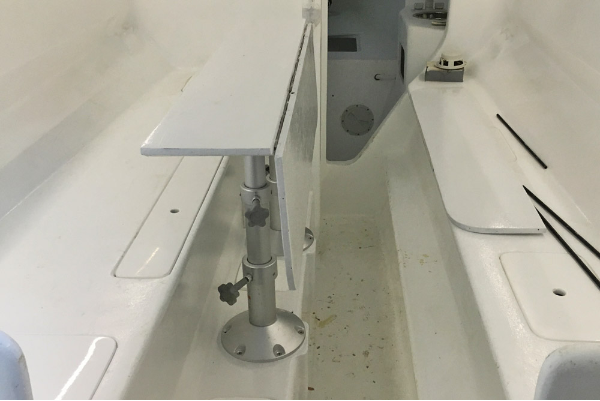
The legs I used are made by Shanghai Eastsun Marine and you can buy them from lots of suppliers wordwide. They're solid enough, using two means they have to be aligned perfectly and (as they're not) the action of raising and lowering the table is a bit jerky. One would have been enough I think, had I been able to position it properly. The long piano hinge was salvaged from the original table, screwed and glued with a Polyurethene adhesive. And the removable leaf has a couple of Tensor Latches to hold it in place.