Let There Be Lights!
Categories
Tags
Recent articles
Ubuntu 16.10 LXC host on ZFS Root, with EFI and Time Machine
How to connect any serial device to the internet
I have lights! A good thing too because it's suddenly very dark outside, and worse inside the boat. I've been tinkering with this one for a while and I'm pleased enough with the latest design to go public with them. Here's what I've got:
- 1 x strip of 5050 warm-white LEDs from eBay - go for the "300 leds/m" variety, you want as many as possible. A 5m strip can be cut down to size, and don't go for the waterproof ones - the silicone coating will yellow over time, apparently, and I've been testing an acrylic spray ("conformal coating") which I'm using to spray all the electronics - it definitely inhibits corrosion.
- Aluminium profiling to hold the strips - if you hit eBay again and search for "aluminium profile LED" you'll find the sort of thing I'm on about. The profile I found is called "SL01" and is about 7mm high, with a frosted perspex cover.
To switch these on, I've designed a small circuit board which fits into the profile and uses capacitive buttons to turn the lights on or off, and dim them too. This last bit is the kicker for me, it means I can light the boat up like a Christmas tree if I want to, or drop the lighting to minimal if I'm saving power.
The full strip at maximum power down one side of the main cabin of the boat (about
2.7m) draws
1.6A 3A, and I'll have one on each side, so roughly 3.2A 6A available in the main cabin (edit - my ammeter was crap. Actual measured figures are almost exactly the 1.2A/meter
they're advertised at). This is very,
very bright - the strips light the cabin evenly and leave no shadows, and with 72W
of LED lighting
it's like working in an operating theatre!
I can also dim this down to under 100mA per strip for a dim glow (and I have a seperate
strip of
red LEDs I can switch to, so I get to keep my night vision too).
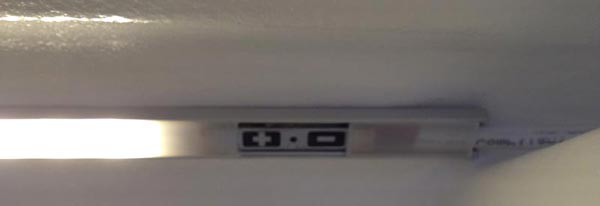
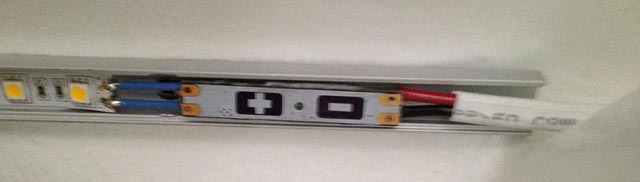
Capacitive buttons means no moving parts - tap the board to turn the light on or off, or tap repeatedly to dim up and down. My only disappointment was I couldn't get this working through the perspex, although it actually doesn't look too bad peeping through a break in the perspex, as you can see in the top photo.
Details to follow, but here are some pics of it being soldered in: for scale, the board is 9mm wide (the capacitive plane on one side and the requirement to handle several amps made it an interesting design challenge!). Also note the colour reproduction is tricky, as it always is when photographing a light source. The warm-white colour is pretty close to a yellowish incandescent and not unpleasant at all.
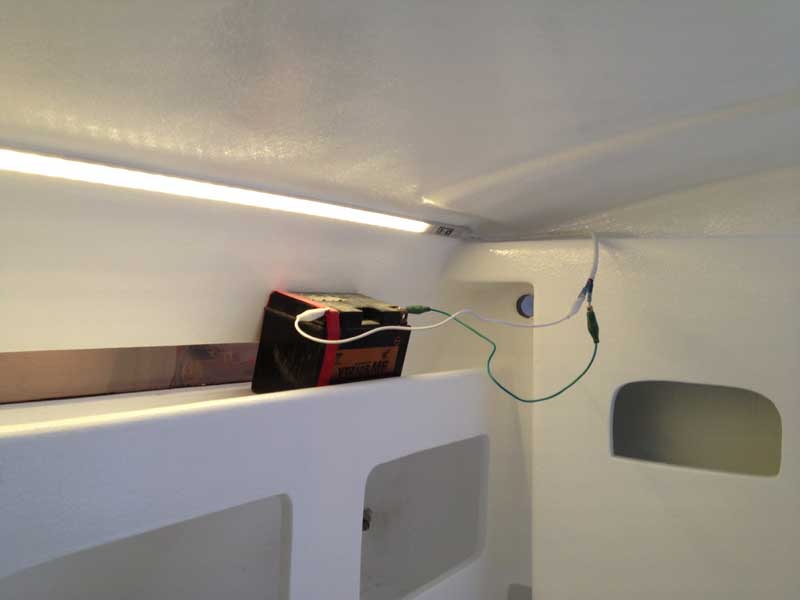
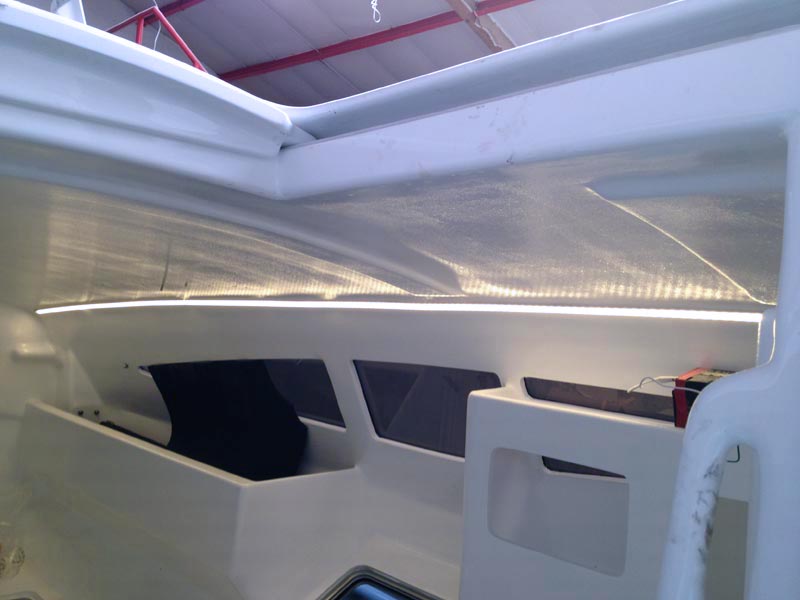
And here's the result
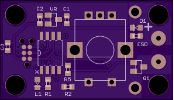
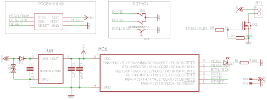
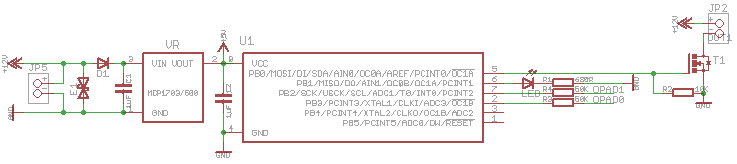
The schema and the board (older revision but almost identical) are here, for reference.
The chip is an ATTiny 25, and the boards
were made with the ever-brilliant OSHPark, who charged me
about £3 per board - small is sweet.

Followup a few months later (Februrary 2015)
What kind of an idiot would use a capacitive light switch on a boat? Not me, that's for sure - perish the thought. Most of the time they were working, but when they didn't (for reasons I never got to the bottom of, but I suspect relating to the tuning of the capacitive threshold between "finger on button" and "no finger on button") the lights would suddenly start turning themselves on and off, or dimming up and down.
This was amusing for a period well under 10 seconds, and I now have a new design with a tactile button that is thin enough to fit under the plastic cover on the switch panel - after several hours browsing in fact I can confidently say they are the lowest profile microswitch in Farnell's extensive catalogue - 2.5mm high on 1.6mm FR4 plus 0.1mm or so for solder and rounding error - it's a tight fit, but can be done. Now I press the plastic above where the button is, the light goes on (or dims up and down depending on whether I press-hold or double-click).
I'll wait and see how this one works out for a few months before I put the schematic up; lesson learned.
Followup, later still (March 2015)
Sweet Jesus, how hard is it to make a working lightswitch? My tactile switches are lovely but fitting them under the perspex covers in the aluminium strips in a reliable fashion is impossible - the perspex is too high or too low or too inflexible. And ultimately it doesn't really matter, build a slightly larger switch with a physical button and be done with it. New design coming.
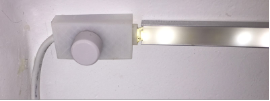
Final followup (July 2015)
Finally. Two boards later (oops, I forgot a diode) I have a nice, simple, reliable and compact board with a rotary encoder to dim and turn the lights on and off, all housed in a 3D printed case. Works a treat. Click here to download the schema, board, firmware and case model.